September 5th, 2014
admin
I purchased this lathe on Ebay in Australia for $1650AUD delivered. I had been monitoring lathes for quite some time and finally a brand new one showed up. David runs a great business and is very efficient and has great customer skills. Most of my stuff comes from David. I highly reccomend getting this lathe as I feel it is extremely reasonably priced compared to what you may find in machinery stores.
here are the specs:
22″x10″ QUICK CHANGE GEARBOX METAL LATHE W/STAND CABINET (NEW)
*perfect for general machining in tool rooms, maintenance and production shops, cast iron quick-change gear box mkes threading easy.
*SPECIFICATION:
-SWING OVER BED:250MM (10″)
-DISTANCE BETWEEN CENTER:550MM (22″)
-SPINDLE BORE:26MM (1″)
-TAPER OF TAILSTOCK:MT2
-THREAD CUTTING: 38KINDS (METRIC & IMPERIAL)
-RANGE OF SPINDLE SPEED:6(125RPM-2000RPM)
-MOTOR:550W/240V/1PH
-GROUND AND HARDENED BED
-TOOL POST TYPE:4-WAY
-MAX TOOL SIZE:12MMX12MM
*INCLUDE:5″-3 JAW CHUCK,6″ 4-JAW CHUCK, 8″ FACE PLATE, MT2 DEAD CENTER, FIXED STEADY, TRAVEL STEADY, STAND CABINET, SPLASH GUARD, CHIP TRAY, CHANGE GEAR, TOOL ETC
|
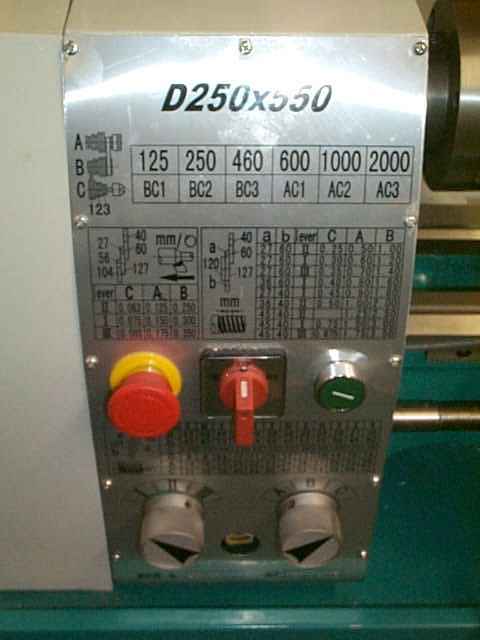
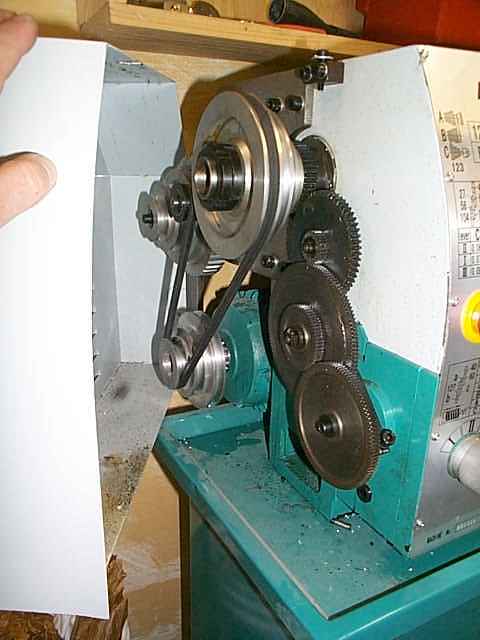
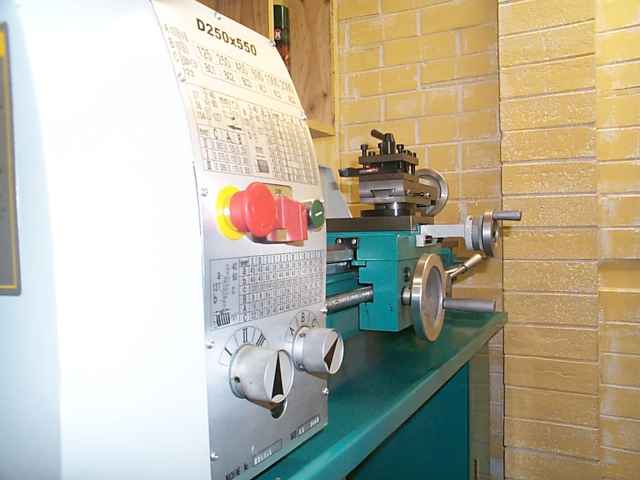
The lathe has an enclosed gearbox. It has a forward and reverse switch, an emergency stop and a energise button. The energise button merely locks in the power relay that the emergency stop button releases providing the e.s button is out.
|
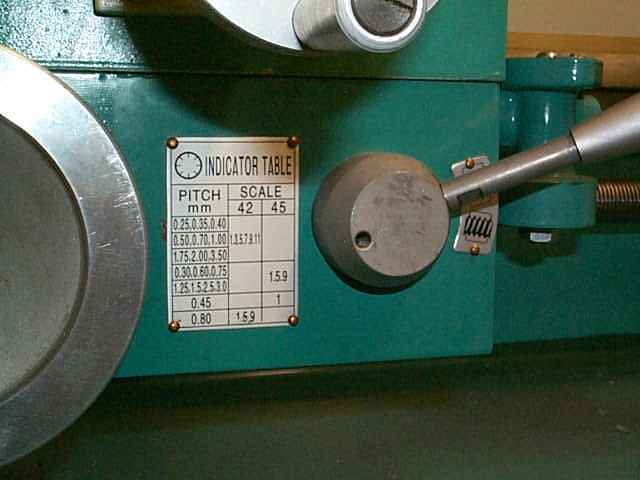
There is a label on the carriage. Dahhh you might say, well it’s purpose is still a mystery to me. The direction of carriage travel is subject to the direction of the motor. You can cut both ways if you like and have the carriage automatically advance.
|
|

Here is a shot of the carriage near the head.
|
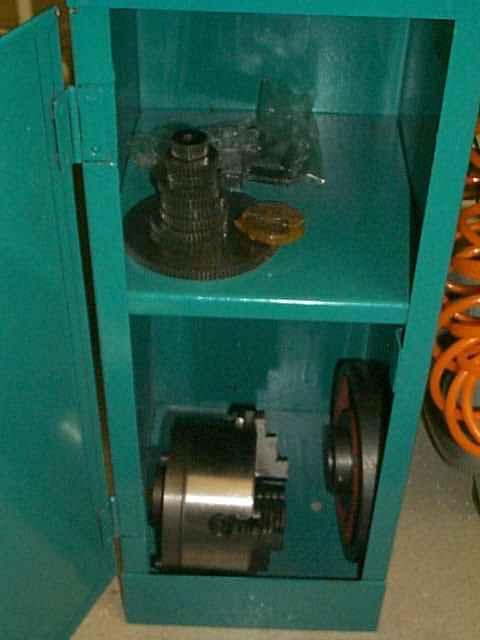
The stand was included in the price of the lathe. It came with a 6″ 4 jaw chuck, a set of reversible 3 jaw chuck jaws, a drive plate, fixed and travelling steady, dead centres, tools and change gears. I haven’t had a need to change the gears, maybe when the current ones wear out……just kidding, maybe when I need to cut some threads.
|
|
The spindle speed range goes from 150 to 2000 RPM. This is a great machine for the stuff I wish to make.
|
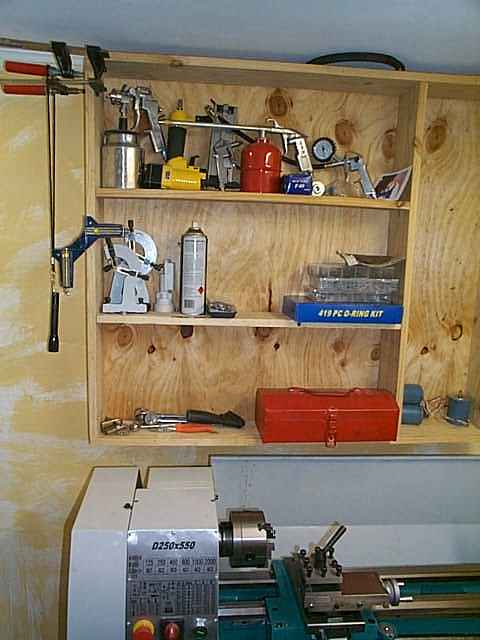
On my shelves I keep the toolbox along with the steadies. I also keep my shop air, don’t you just love that phrase, I should say my piss weak little compressor accessories on the shelves as the compressor is located beneath the lathe.
|
|
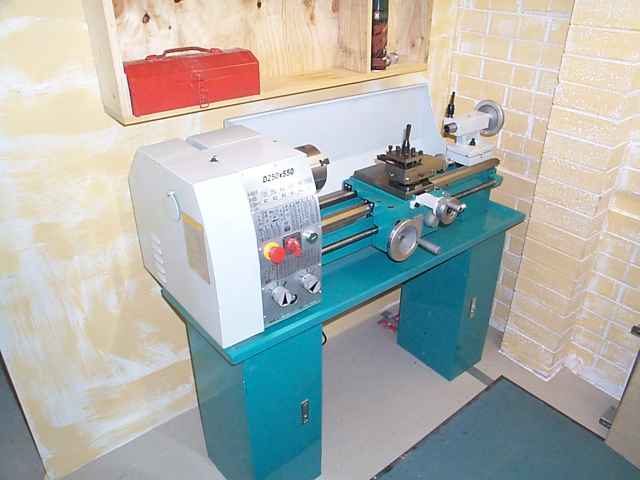
Here is an overall shot
|
Here I am trying to turn you on. Isn’t this a sexy machine?
|
|
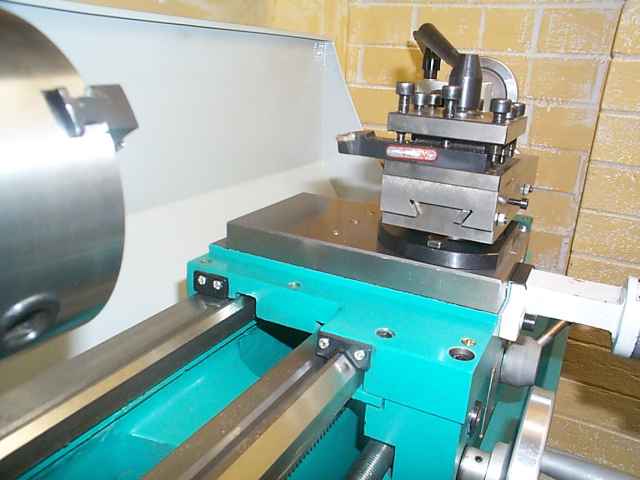
Here is a shot of the 4 way tool holder with a tool in it.
|
|
September 5th, 2014
admin
When building our home I took into account that I would require space for a workshop.
I had a three car garage built but only opted for two car spaces. The third garage space was dedicated to the workshop area and a roller door was not installed. The ceiling in the garage is 2900mm to enable storage space and plenty of headroom. This is crucial, as you will sometimes need to ensure you have space for additional future requirements, from headroom to technology or automatic roller doors. There is no storage in the roof itself due to the design of the roof structure ( timber trusses ).
In my last house I did a similar thing on a smaller scale. Unfortunately that workshop was built in front of a roller door and was removed when we sold the house. A mate of mine ( Alex ) who now resides in Switzerland coined the name “Bootka” in relation to my workshops. “Bootka” is a Russian word that means booth. I like plenty of room but I also like things cosy. A Bootka always solves the problem well.
My intention was to contain all of the machine tools within the workshop room however things have gone a little askew. There was not enough room to accomodate the machinery so I have shifted the machine tools to the far side of the garage. I only have one car so it is no issue. I am very pleased at how things have turned out.
I have far more room to move when machining and am able to utilise the workshop area as an assembly / dissasembly zone for my various projects. I have also installed a desk and a PC which is critical for internet info at ones fingertips.
|

This is the position of the workshop with reference to the garage. I put a 45 degree entry to the corner of the workshop to enable easy pedestrian flow. Also it is good for chi energy if you are in to feng-shui. Note I also have a 45 degree corner on the workbench.
|
|

This is a perspective view of the workshop. The 250mm lip around the front prevent anything that is stored on top from being accidentaly pushed over the edge.
|
|
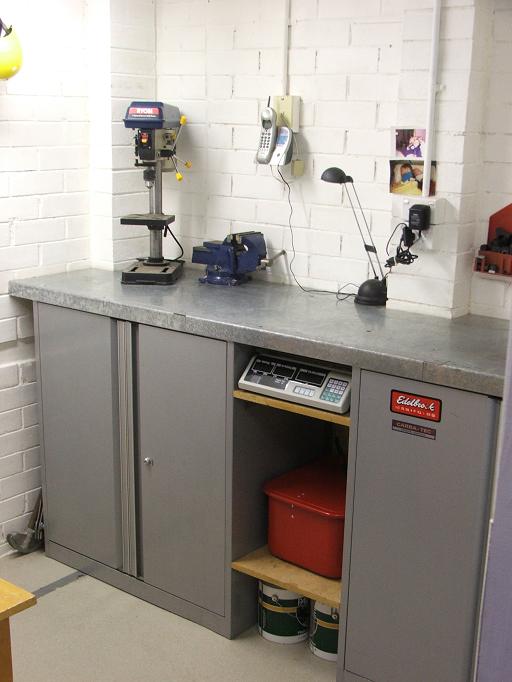
This is a shot of the inside of the workshop as it now stands. The benching remained. The vice is yet to find a permanent mount so I currently only bolt it in when I need it. The small drill is used for plastics and wood when I need a quick fix for a hole.
|
|

The computer and desk are on the opposite wall of the benching in the above photo. There is still plenty of room to move around.
|
|
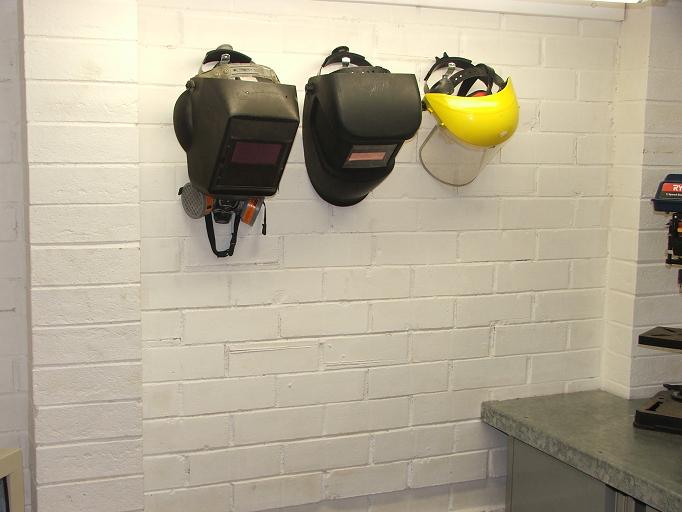
Safety is the most important thing in a workshop. Keep your equipment handy.
|
|
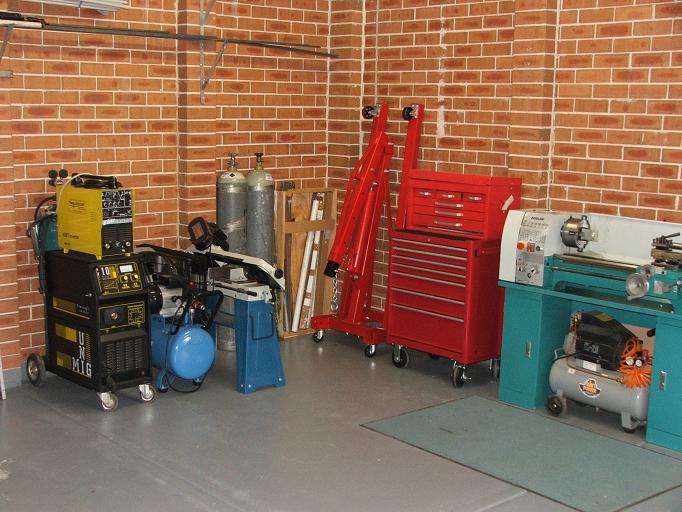
This is a shot of the new layout. The floor has been painted with special floor sealer.
|
|

The rubber backed mat in front of the lathe is for operator comfort.
|
|
An additional benefit of having the machinery set up here is that I can open the roller door and let in an abundance of natural light and fresh air.
|

A shot of my 2 apprentices.
|
|

|
September 5th, 2014
admin
Hi,
I have long dreamed of being able to share my knowledge and experiences with people of similar interests. This website is the culmination of many years in dreamland, hardwork and saving, saving, saving.
My name is Pete and I am a newbie machinist. Over time I will atempt to teach myself how to build stuff in my workshop with some degree of professionalism and accuracy and all without losing limbs or blowing myself up. What kind of stuff you may ask? Well, anything really. You can’t make stuff unless you have the tools, so I keep telling my missus. Here are just some of the things I would like to build:
|
A magnetic perpetual motion motor
|
A jet engine
|
A rocket engine
|
|
A flight sim motion platform for a single seat
|
A go kart
|
A model boat – jet or rocket powered
|
|
|
A motorised driveway gate
|
A pergola
|
|
A magnetic perpetual motion motor
|
A jet engine
|
A rocket engine
|
|
A flight sim motion platform for a single seat
|
A go kart
|
A model boat – jet or rocket powered
|
|
|
A motorised driveway gate
|
A pergola
|
I hope to inspire other mental patients…kidding of course, to give up their computers ( other than web editing and email and cnc stuff ) and get into making stuff with their minds and their hands.
The purpose of this site is to provide my take on setting up the workshop using realistic resources and a small amount of space.
Throw away that electronic console game and get your hands dirty. It is time to start making things with our hands.