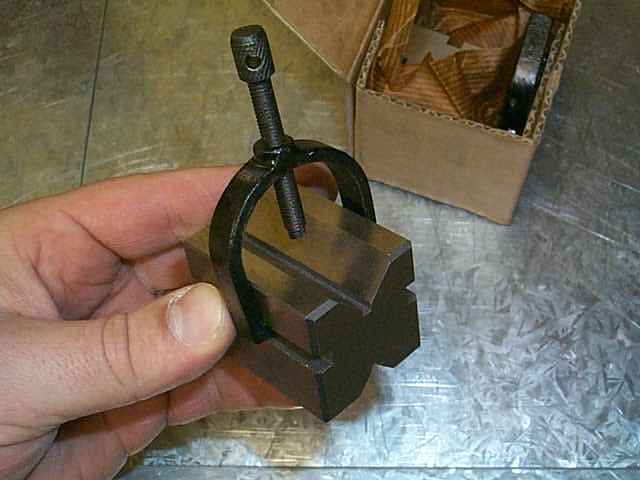
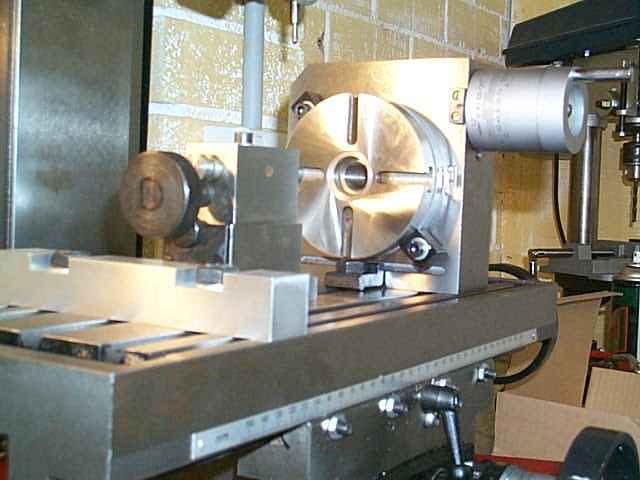
V Blocks are used to assist in the milling of flat surfaces on circular sections. The round section of stock is placed in the V and the clamp is tightened. You can then clamp the whole lot down.
I have not used these yet.
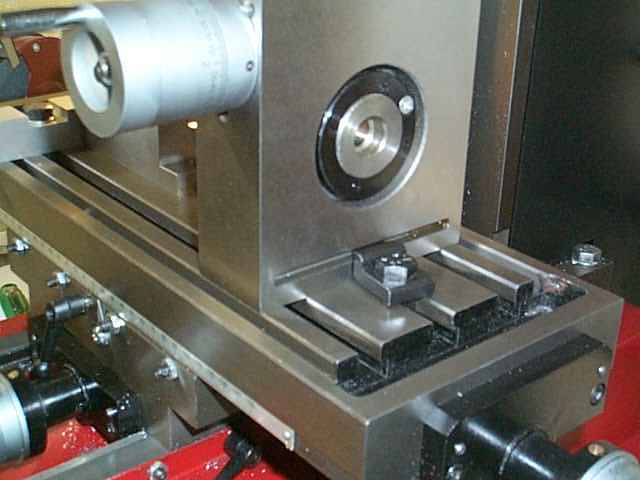
A shot of the V Block. I will add some more pics and details when I use them.
End mills come in all shapes and sizes. There are many different systems for securing end mills but all operate on the same premise, tight hold. My mill has a morse taper of 3 also known as MT3. I decided to purchase a collet set as this was in my case least expensive. You can opt for MT3 collets instead of a collet chuck however the process of changing them is the same as removing / installing the collet chuck. If you need to change collets regularly, a collet chuck is quickest. Why not just use a drill chuck to hold the end mill? This will result in movement of the end mill which will affect the finish of the job. The collet holds everything tight. My collet set goes up to 16mm which does most jobs. For my 20mm end mills, I need to buy a collet that will go into the spindle direct.
This is my collet set. It contains collets, a collet chuck and a collet chuck key.
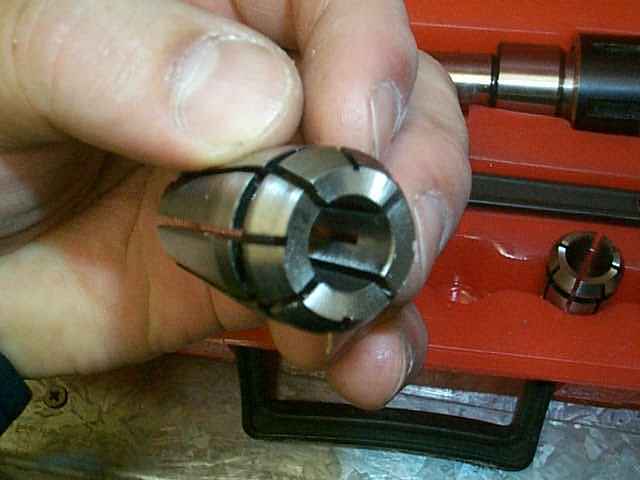
This is a collet.
The collet is tapered so that when the chuck is tightened, the collet is pushed back into the collet holder causing it to compress. The compression force secures the end mill.
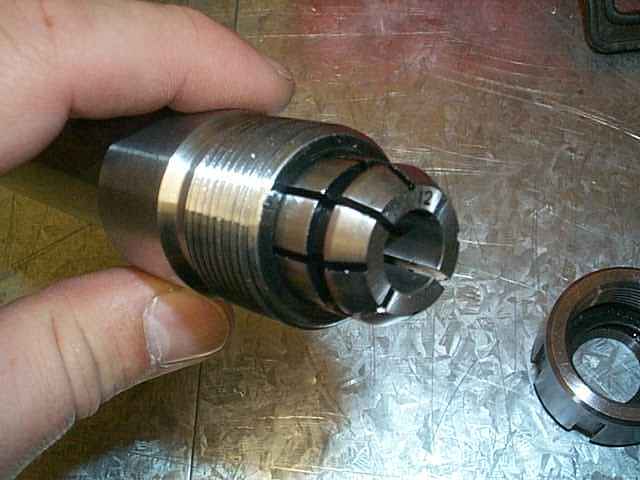
The collet chuck is basically a hollow nut that screws over the collet and onto the collet holder. The nut then pushes the collet back into the hjolder causing it to compress into the direction of it’s axis.
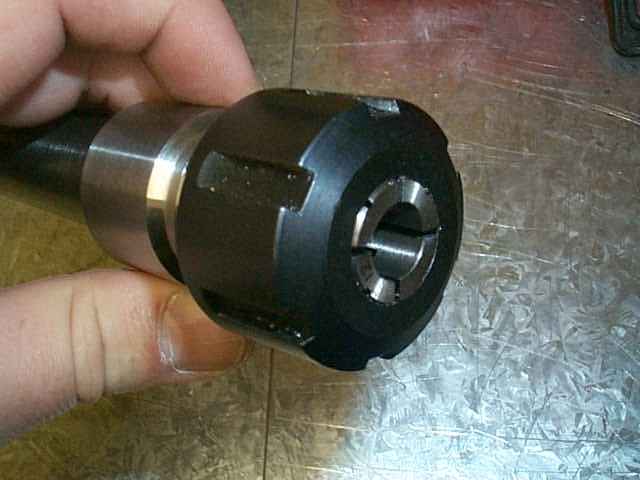
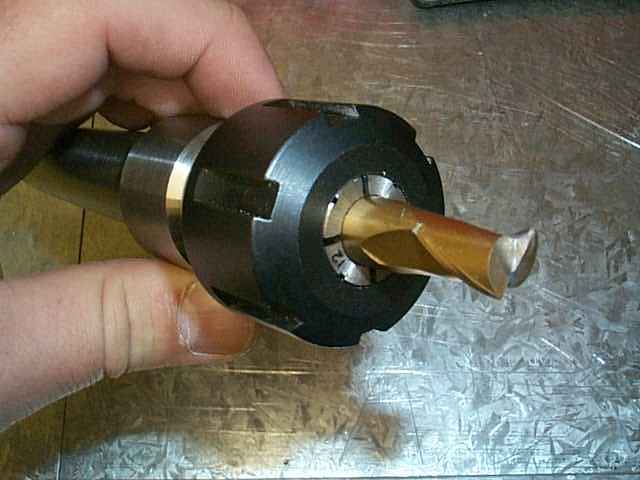
This is what it looks like when you fit a 12mm 2 flute end mill.
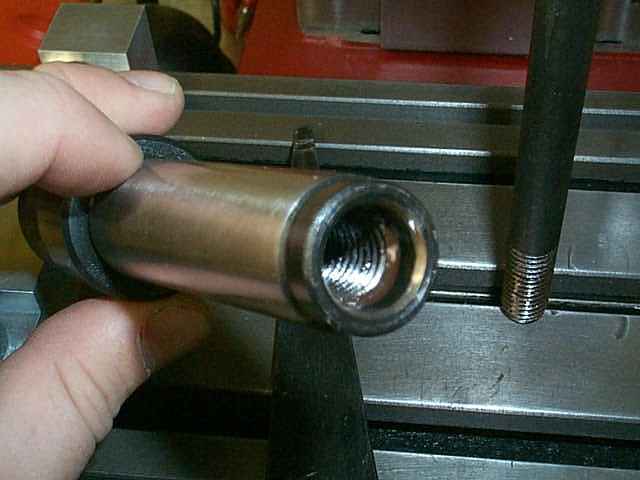
The other end of the collet holder has a threaded hole in it. This threaded hole points upward when the holder is inserted into the milling machine spindle. The drawbar is threaded into the hole.
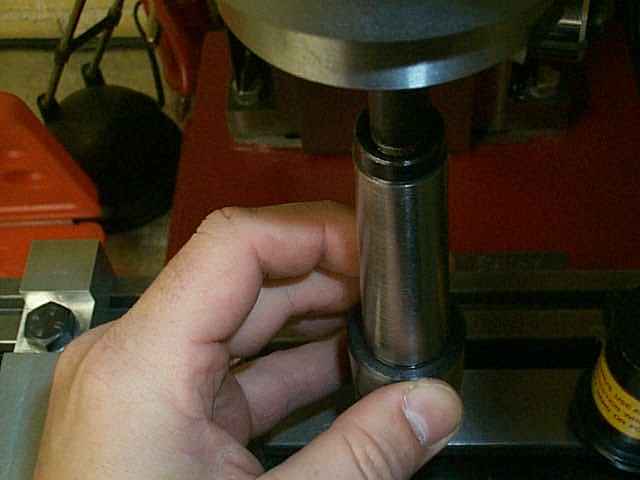
Threading the drawbar into the collet chuck before pushing the assembly up into the spindle. The black thing on the right is the cover for the splined shaft in the picture on the right.
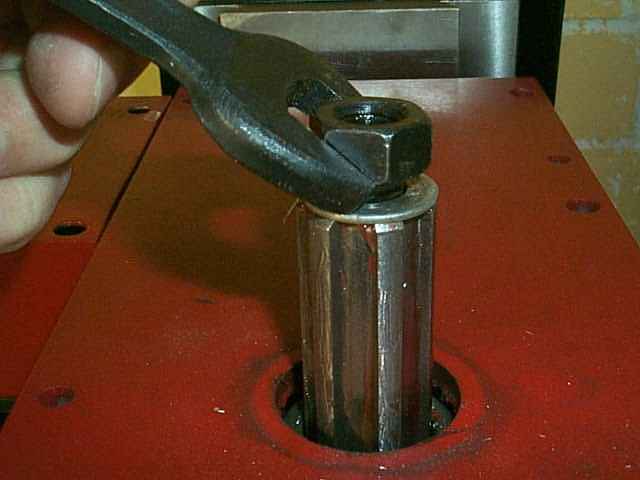
Once the assembly is pushed up into the spindle, the draw bar pockes out of the spindle drive shaft. A washer and nut is fitted and the whole thing tightened. The nut pulls the draw bar up and this brings friction forces against the taper of the spindle. The tighter you tighten the harder it holds. There is no need to tighten too hard anyway as the taper holds well with little force.
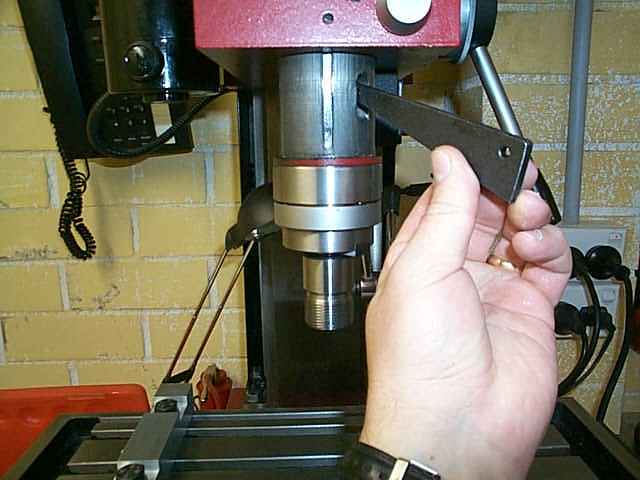
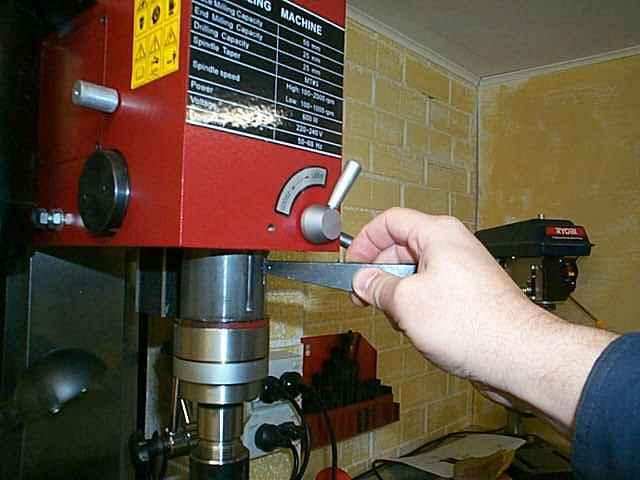
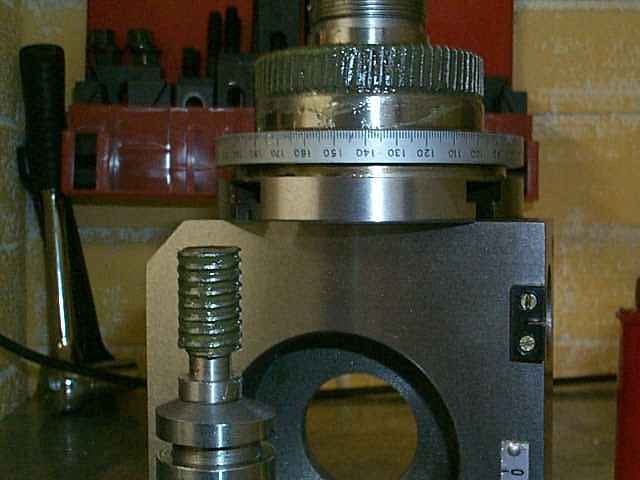
I normally stick this wedge in a hole in the spindle shaft to lock it whilst tightening the nut or the collet chuck.
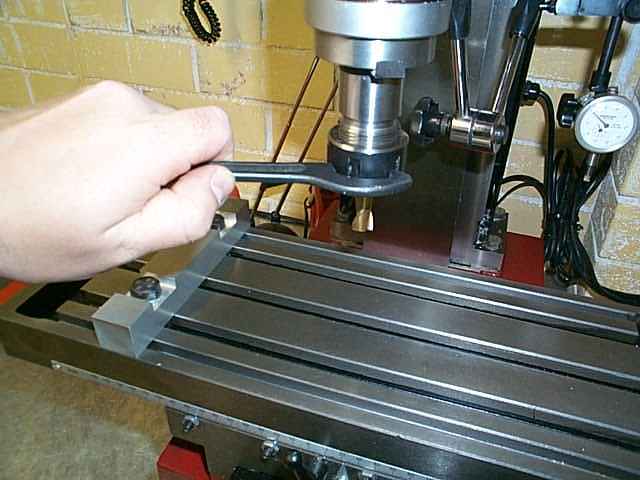
Left or righjt handed. I am a really talented person. LOL.
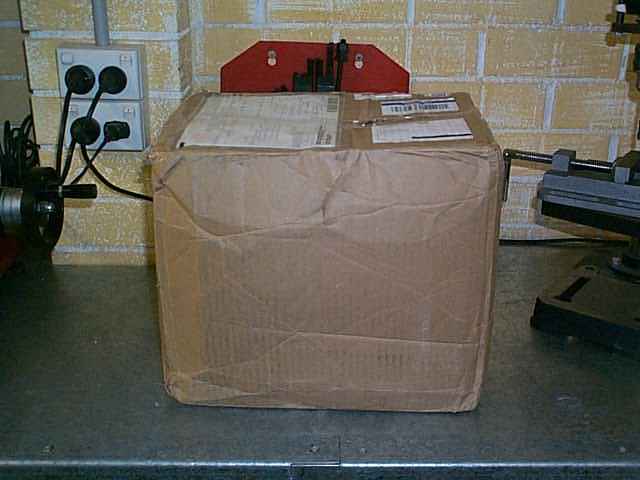
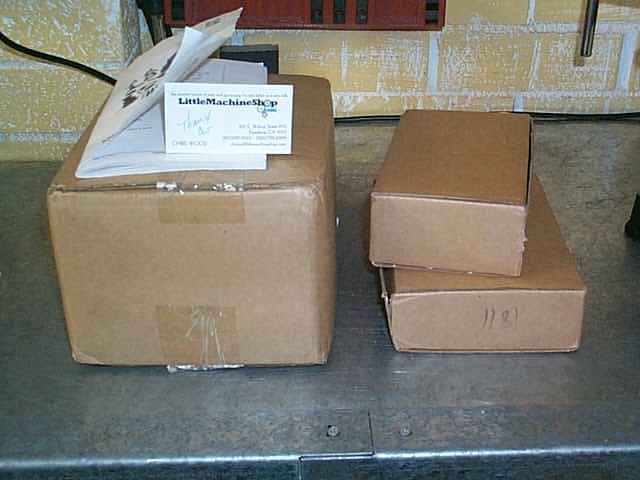
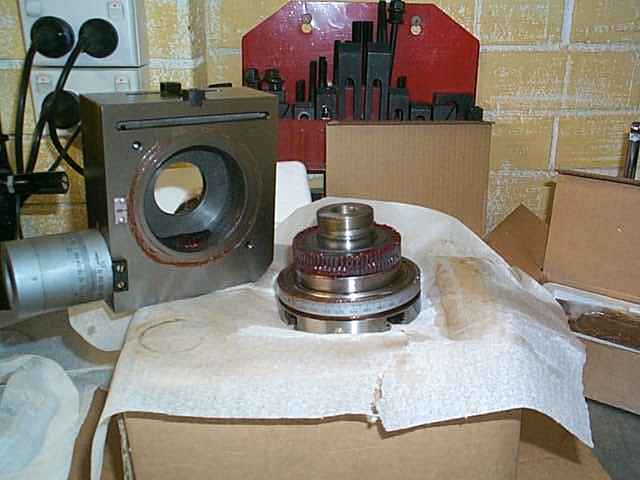
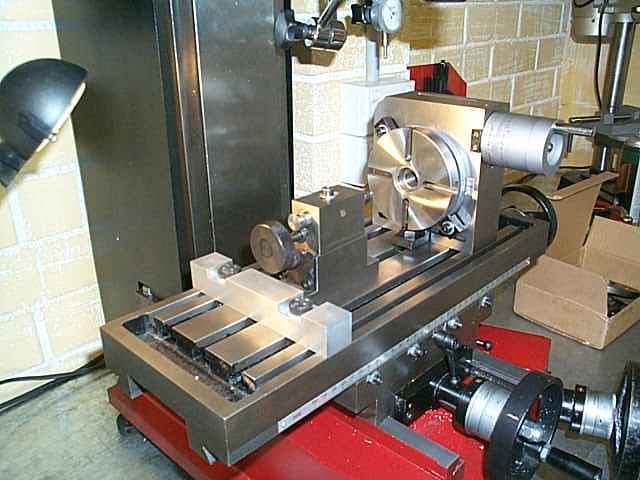
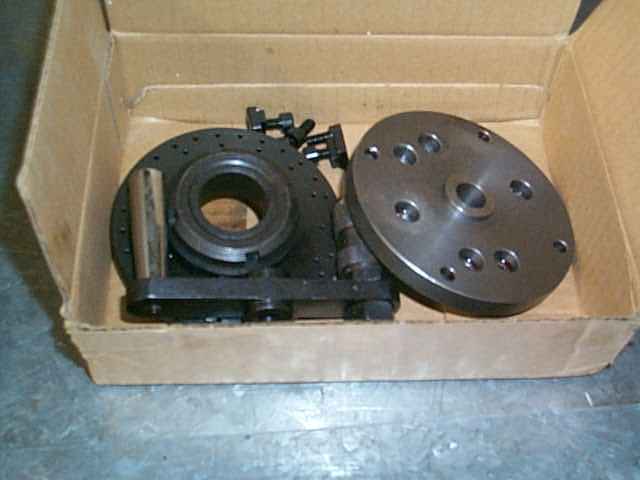
t has been a long wait of 10 weeks but finally it arrived, by boat. My rotary table with dividing plate and tailstock. The folks over at the Little Machine Shop have a wonderfull range of products, this being one of them. All up it cost me about $370AUD with shipping.
This expose will deal with the unpacking and clean up of the components. I will try and work out how to use it over the coming weeks and add an article to the documentation section
It is finally here, a box from the USA…can it really be the rotary table? I had waited such a long time for this day to finally arrive.
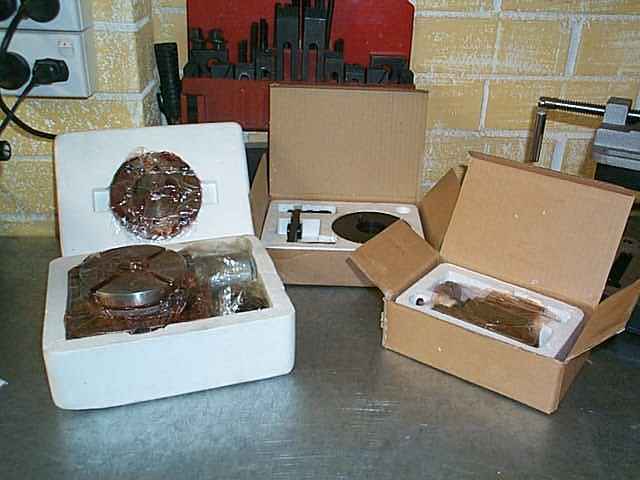
Inside were thre boxes and a heap of statically sensitive foam fill. I used the vacuum cleaner to assist in the unpacking operation.
Everything was well wrapped in plastic and preserved in red grease. It could probably sustain many millions of years of mummyfication due to the grease.
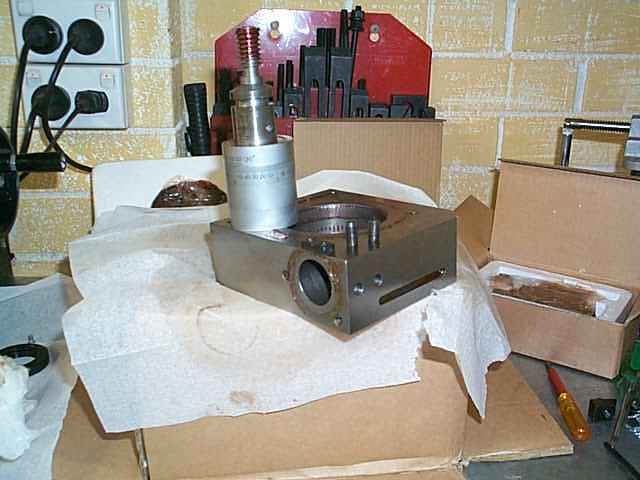
Now how does this sucker pull to pieces?
There is a screw on the bottom that locks a vlack threaded ring. Remove the screw and unscrew the ring.
The rotary table should now ease out of the base with very little force. Grease everywhere.
There are two grub screws that keep the vernier locked into the base. Remove them and gently twist and pull until it is free.
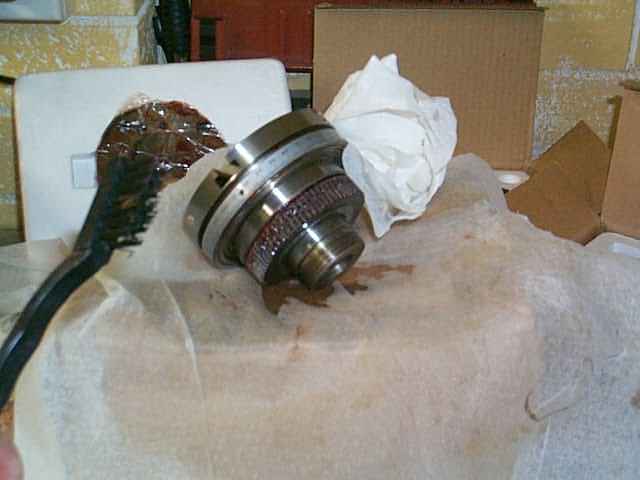
The grease is hard to remove from the rotary table’s gear teeth. I opted for a brush with plastic bristles. Wear eye protection to avoid red grease eye!
The dividing plate is tricky. There are many holes and they are all full of grease. Patience is a neccessity.
Look at all those clean and shiny components. It is a real treat to run a clean workshop.
Here is a shot of the gears re greased with BP lithium grease, same as the mill. Not red but green.
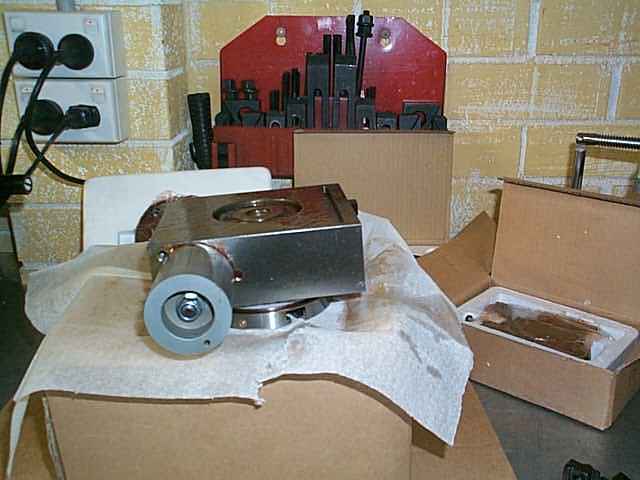
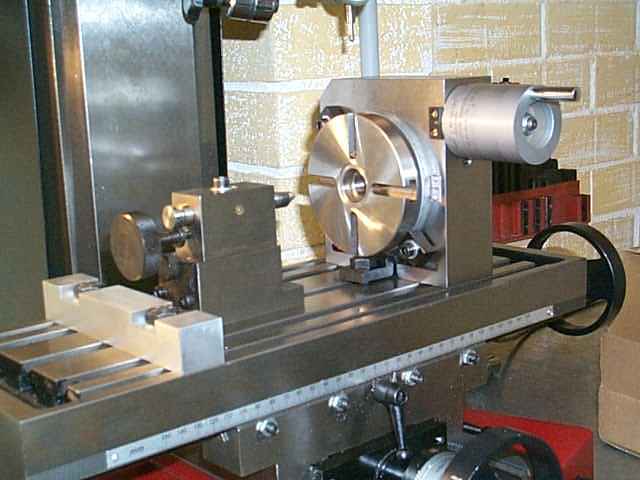
Anybody getting turned on yet?. Shiny = Sexy!! I have stuck it on to see how it fits.
Different angle.
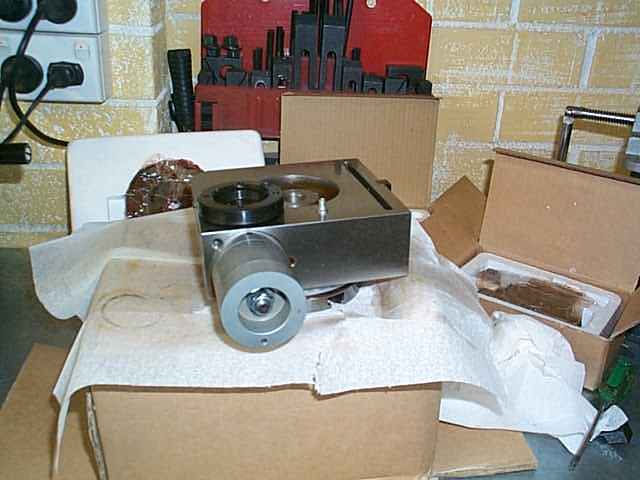
The clamp on the rear. See the black ring with a screw in it, that’s what I spoke of earlier.
And yet another angle.
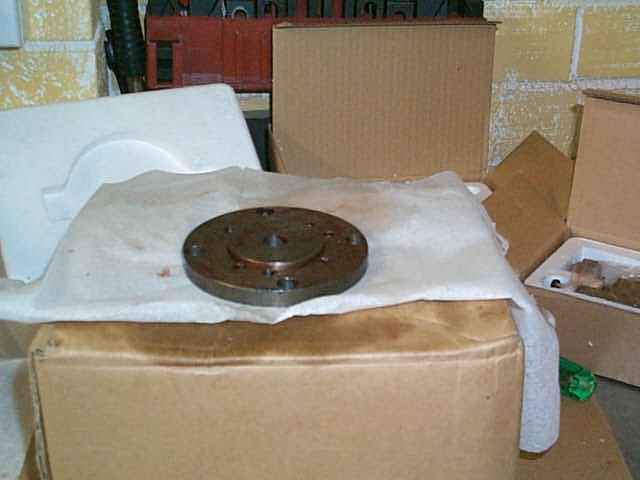
Leftovers? No, this is the rest of the stuff, indexing plate and T-Nuts, bolts etc.
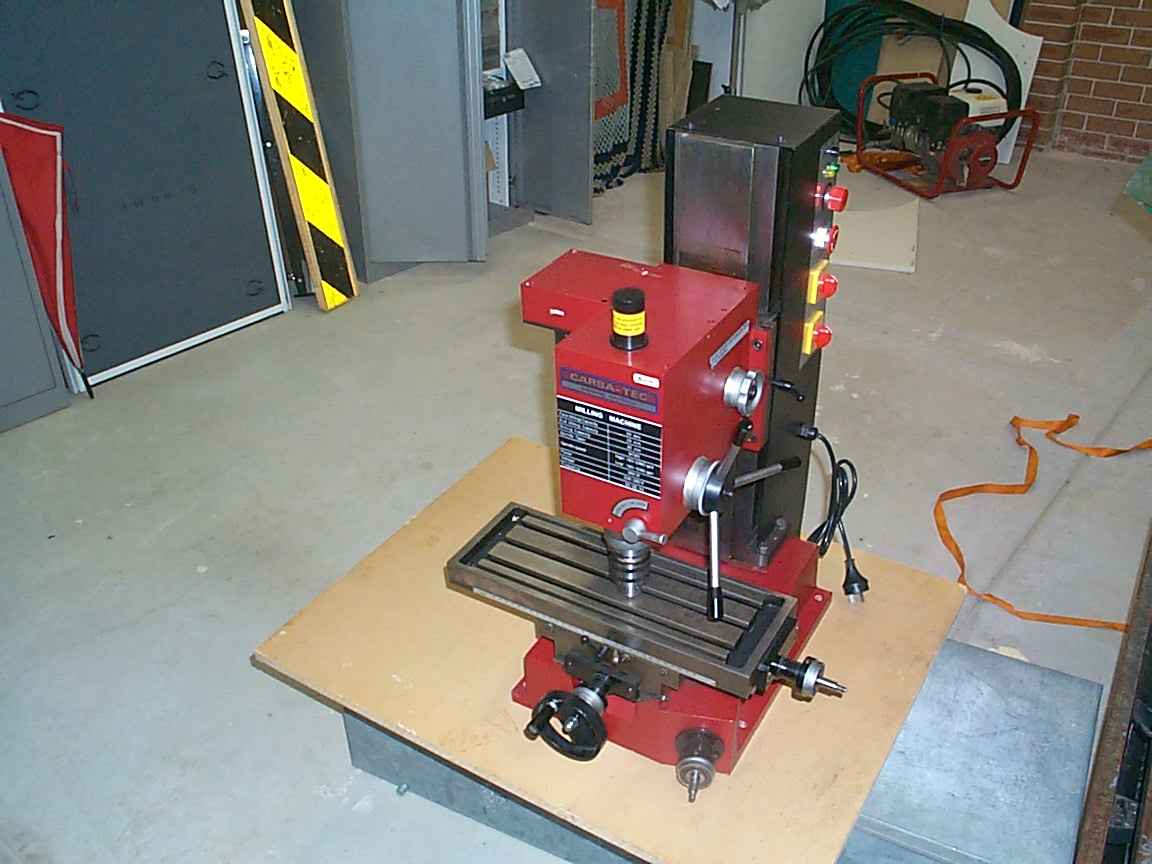
SIEG Industries X3 Mill / Milling Machine and Drill. The Super X3 will be updated shortly also. This is the same machine sold by Hare and Forbes HAFCO and by grizzly and harbour freight in the USA. My take on it and the experience of purchase.
Ths is my Milling Machine. Assembled by Sieg Industrial in China and purchased from , of all places, a woodworking specialty store. Amazing what you can find when you look in all the wrong places. This Mill goes by the name of the X3. This machine is the next step up from the mini mill. The mini mill is called the X2 and is sold by Hare and Forbes in Australia or Harbour Freight / Grizzly in the United States. The Mill is capable of 25mm drilling / end milling or 50mm facing. This is more than enough for most small projects.
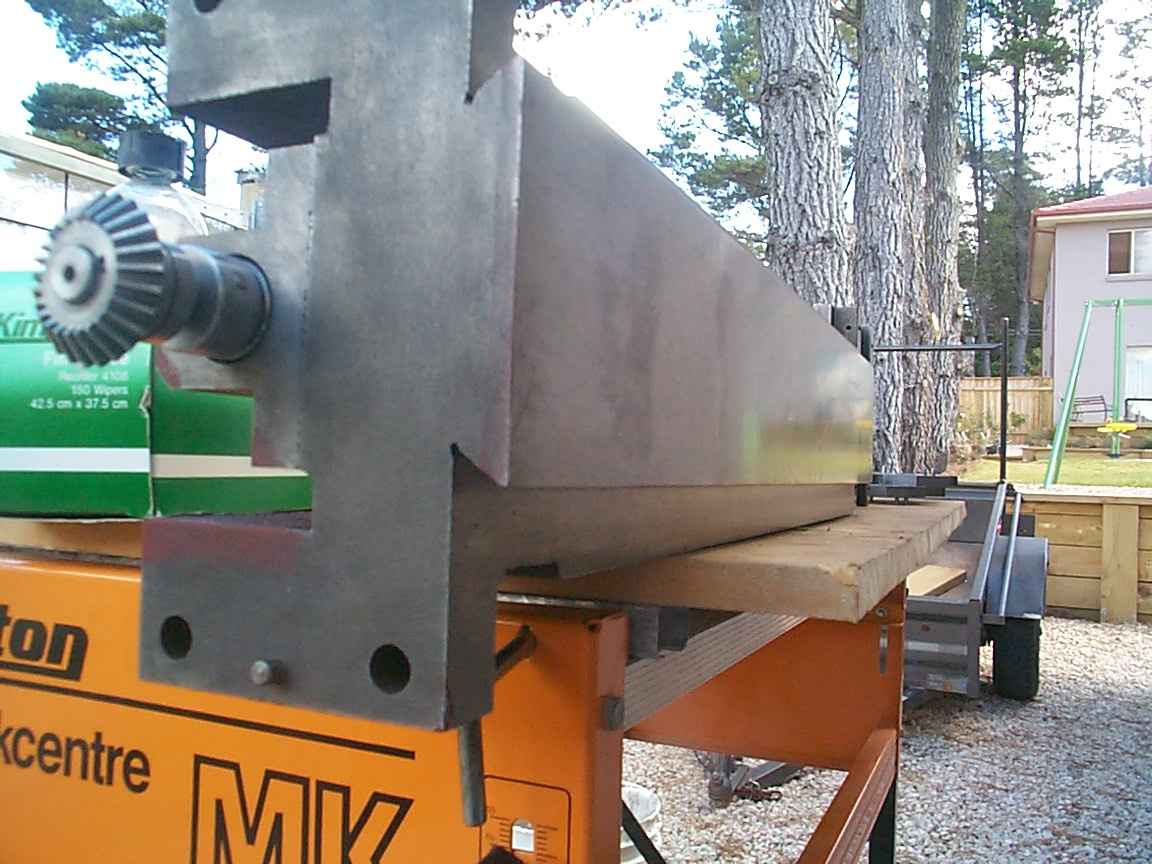
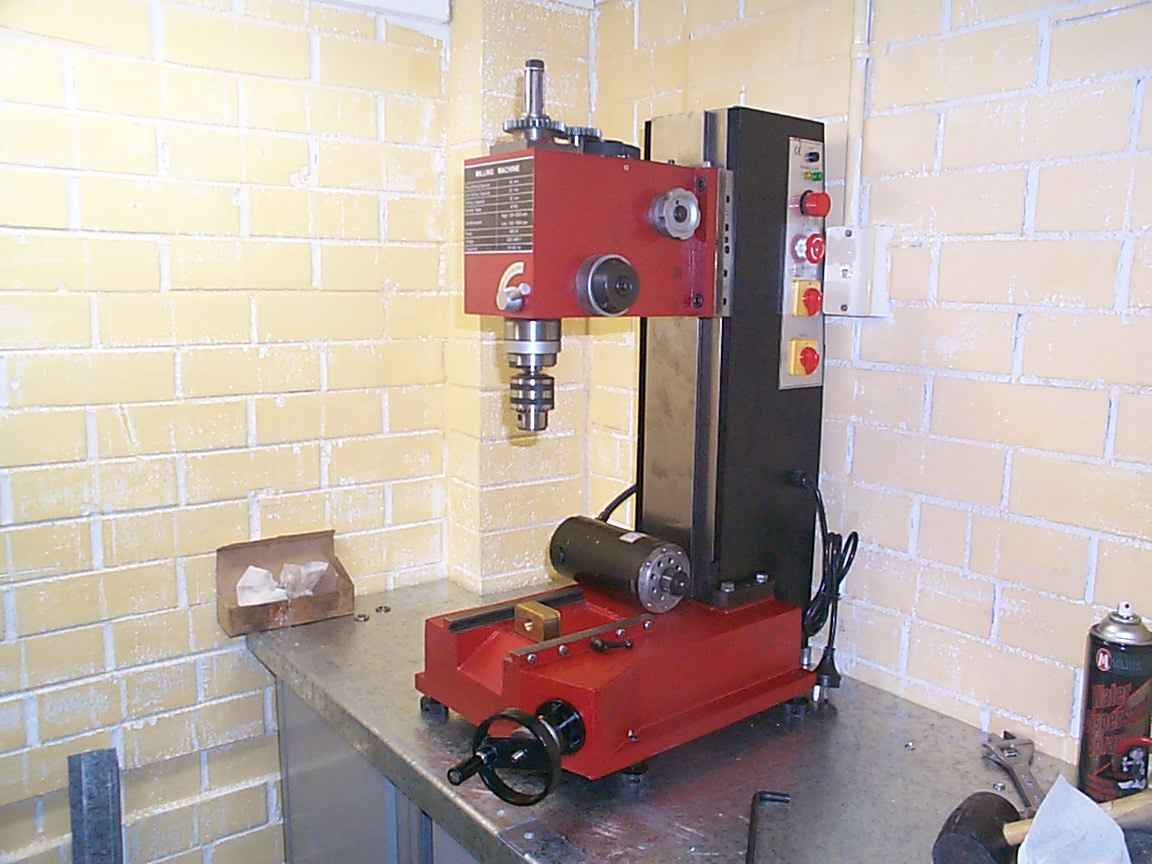
Fresh off the trailer. This was a showroom floor model so it did not come crated. It still has gunk and red grease all over it.
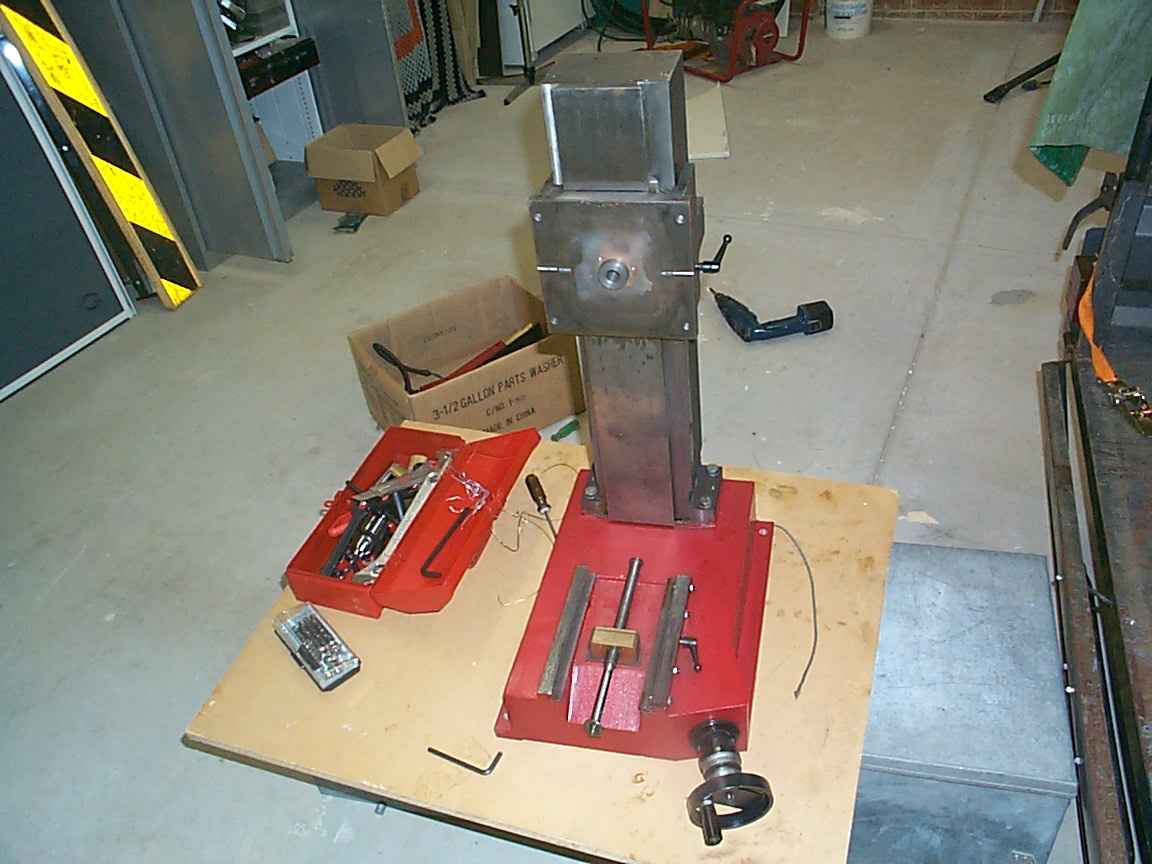
Mostly a naked machine. Only the column and base are intact. At this point I decided to separate the column from the base and clean everything. The possibility of a new paint job is on the books too.
The column has a loaded gas strut. BEWARE!
I secured the strut with a piece of fencing wire. There is a screw top and bottom of the gas strut, note the hole in the head screw block.
Secure the strut before you release the screw from the strut. The column is then free to remove. Release the four bolts on the bottom.
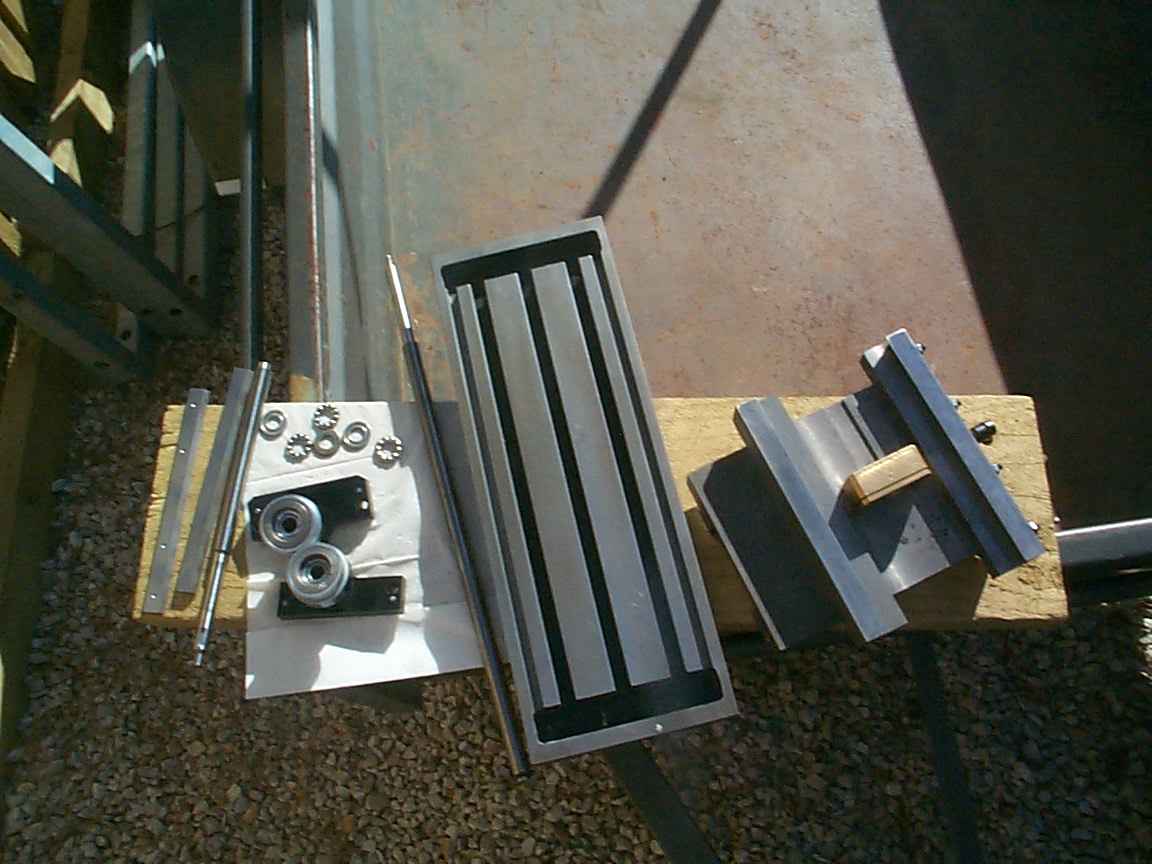
Here are all the main components laid out ready for thorough cleaning, lubrication and assembly
It is important to have plenty of wipes on hand and a can of WD-40. The base is easy to clean.
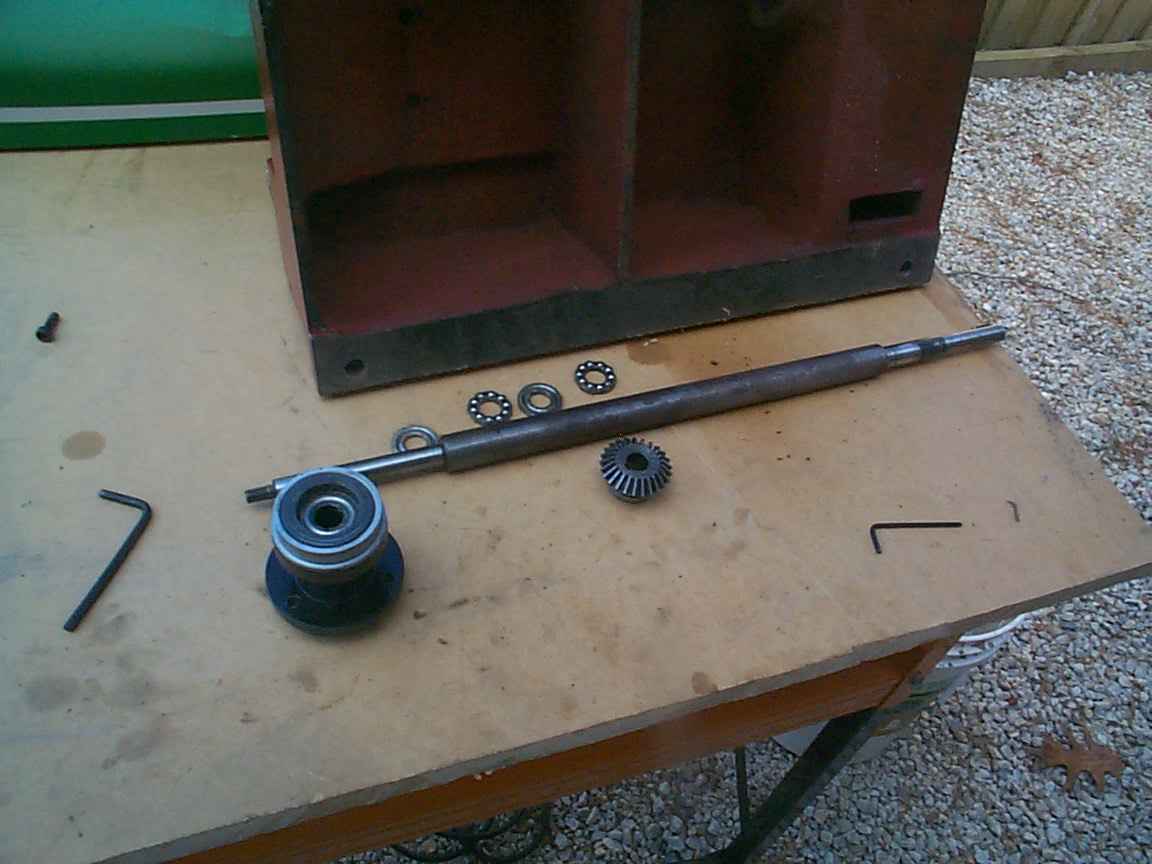
The Z axis was removed as it felt very heavy despite having no load to move. There are bearings in the housing adjacent to the Z axis handle and a brass bush at the other end near the column.
The bearings were gunked up with dried grease and the grease in the bush was sicky. Everything was treated to a turpentine bath.
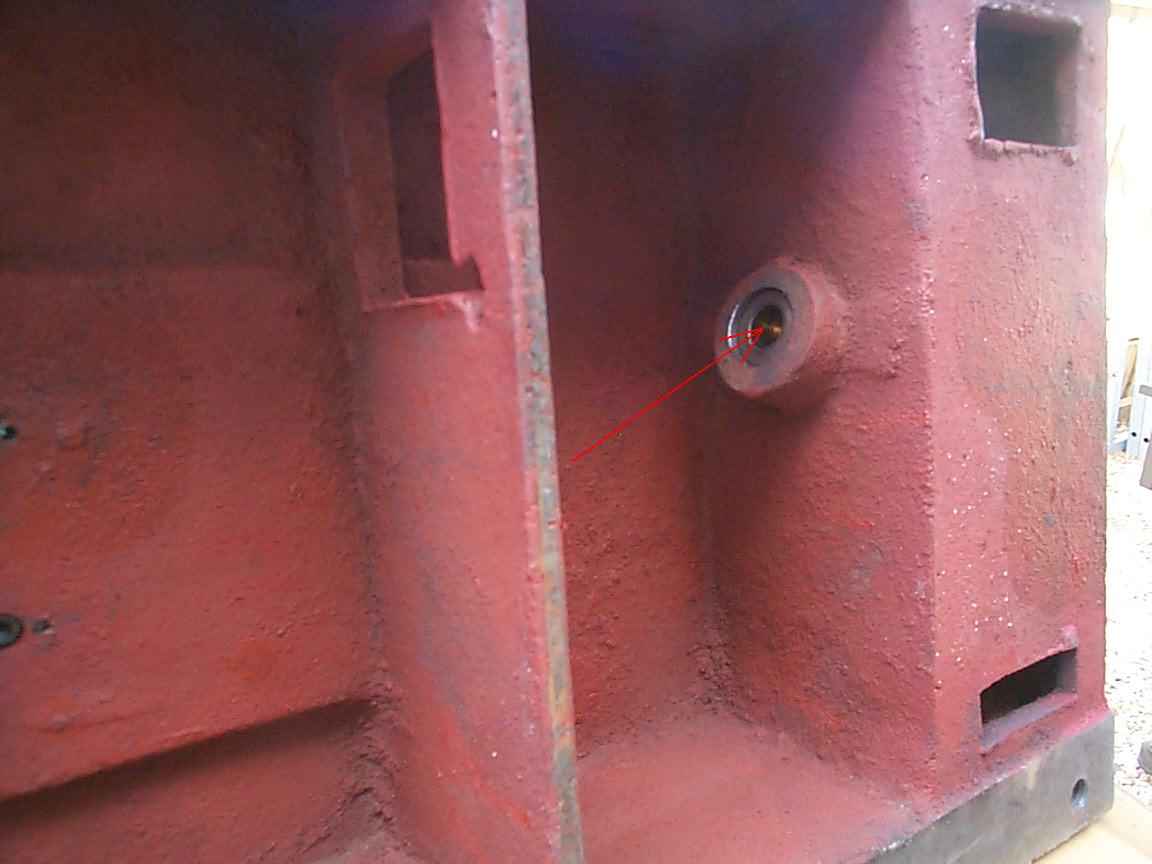
I noticed the Z axis bush near the column had an oil tube installed. I investigated the top side to try and find the oil point.
I found out why at first I did not see this oil point. It was covered by paint. I subsequently removed the paint and tested but found it clogged.
Compressed air and a fair bit of poking did not resolve the blockage. Looks like this oiler is a dud.
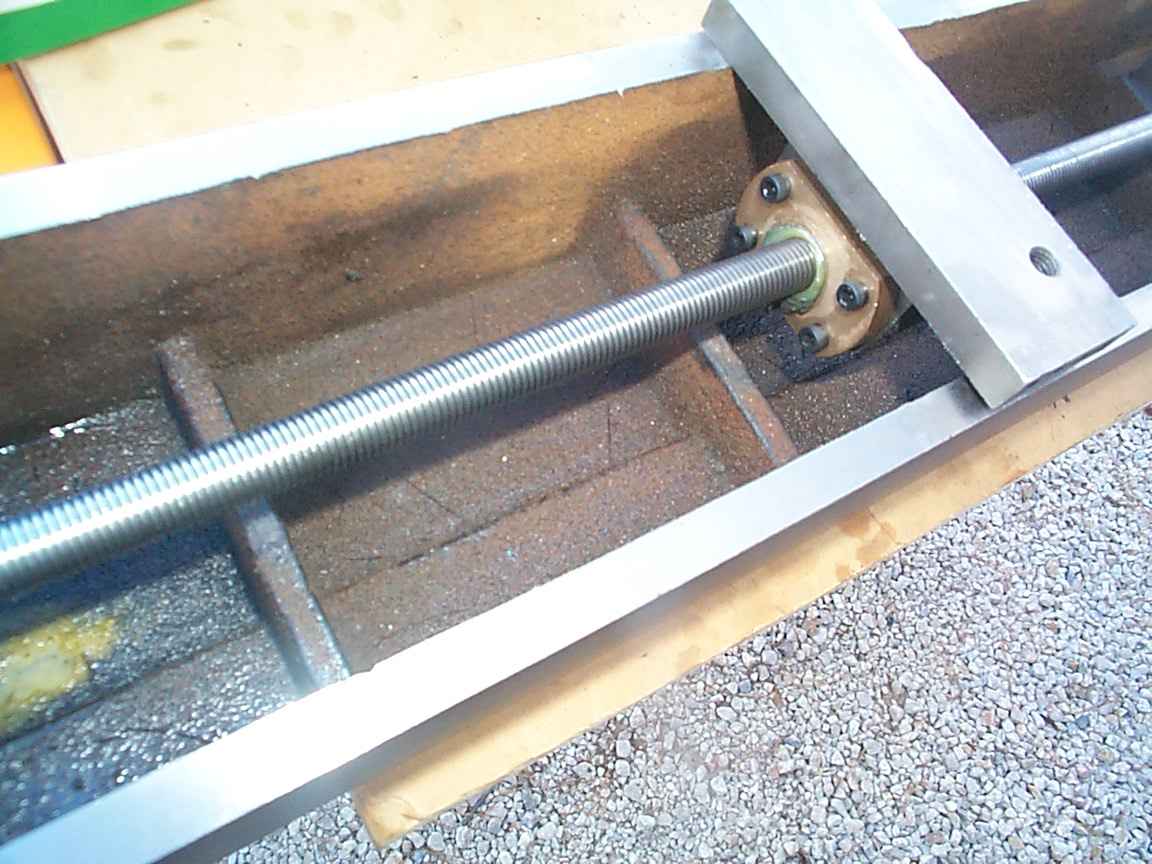
The Z axis screw was cleaned. There was a lot of dried grease in the thread. New grease was applied and the screw was run from end to end.
I connected a battery drill for this operation as it would take forever with your fingers.
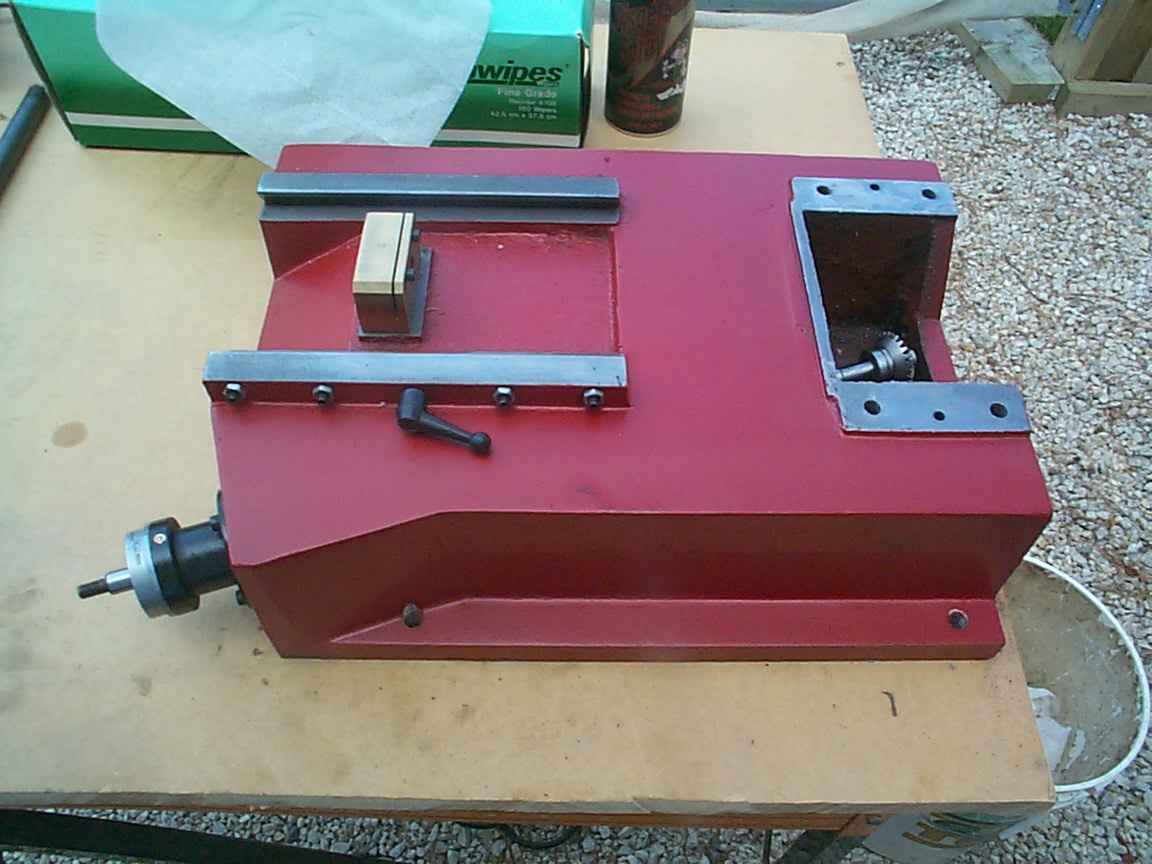
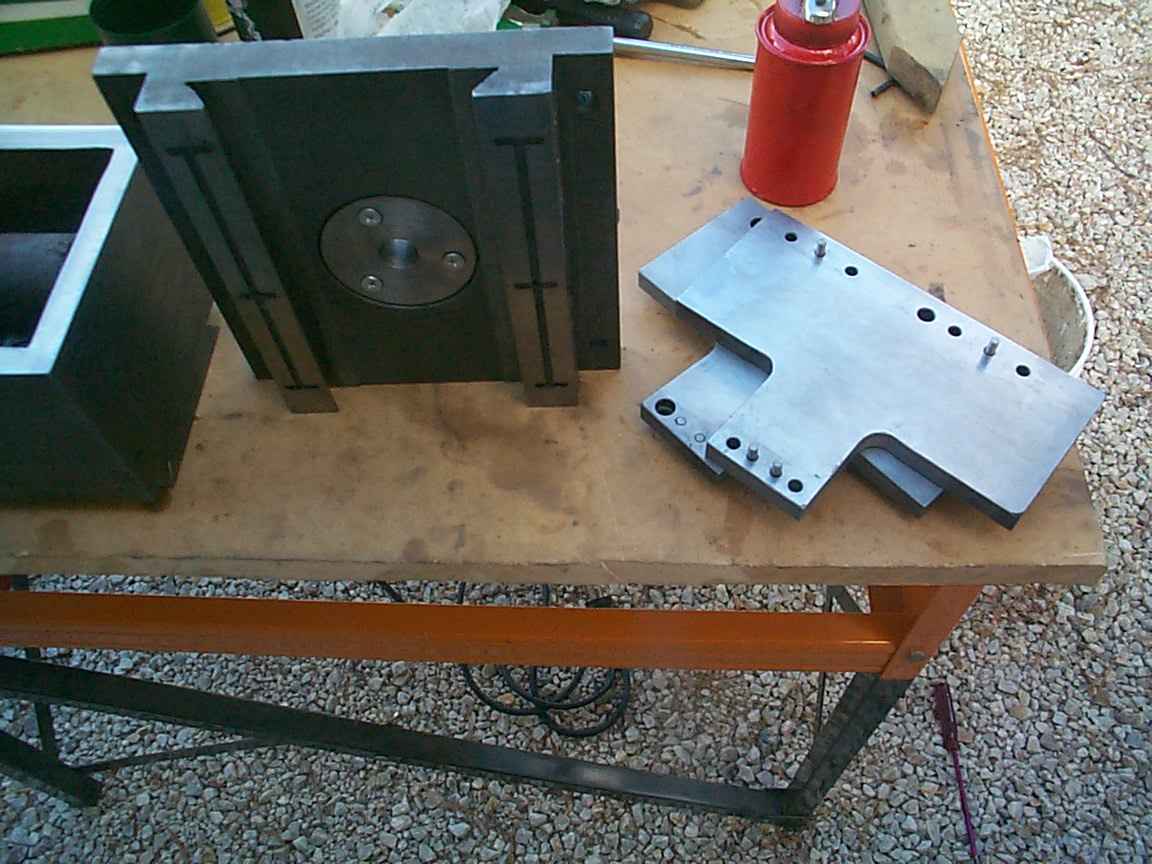
Here is the cleaned up head mounting assembly. This is one rigid mill. The quality of the casting is quite reasonable for a low cost machine.
Here is the cleaned up column. Stamped as number 25……..wonder who has number one?
The compound slide took a while to clean. There are plenty of bearings. My only gripe is the quality of the circlips used to secure the stop washers at the end of the XY screws. Cheap Cheap Cheap.
Looks like they are made of mild steel not spring steel. Spread them and they permanently deform.
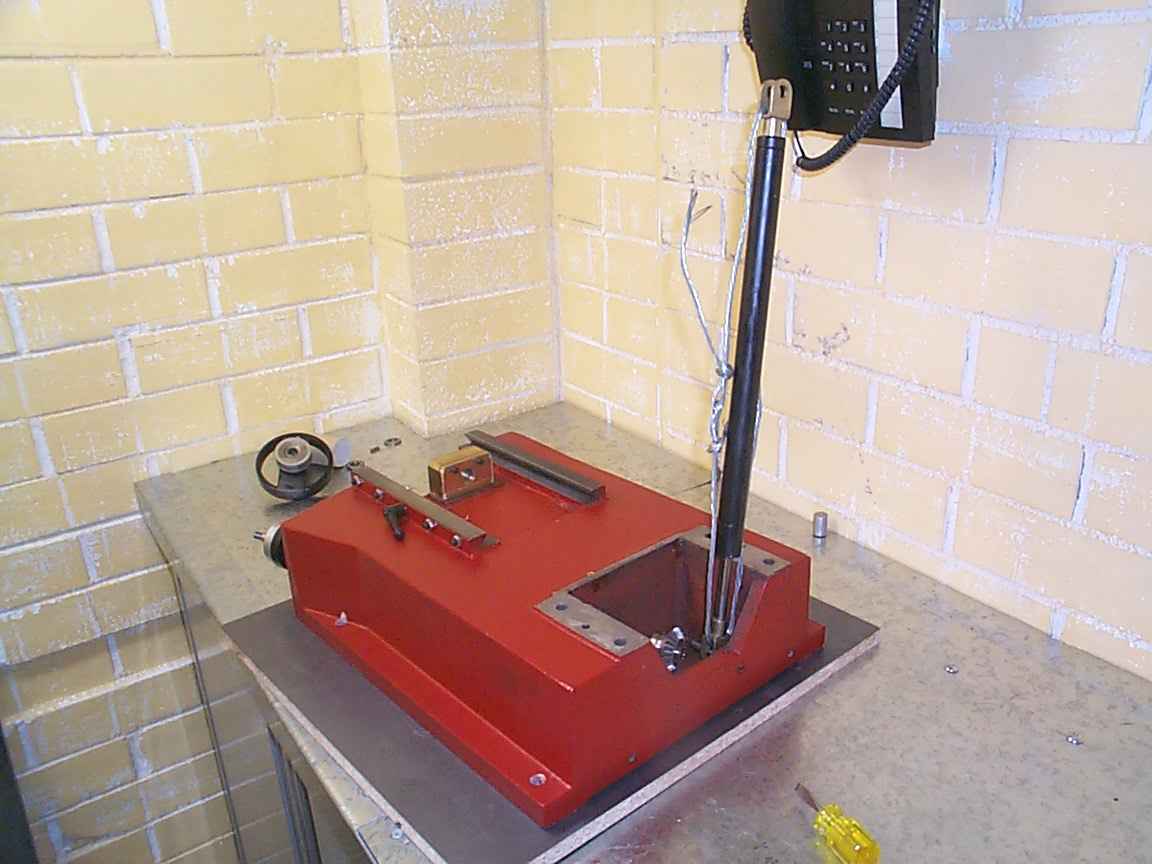
Remember the strut? I put it back onto the base before adding the column.
The Z axis gear assembly at the base of the column posed an issue during installation of the column. I had to shift the gear on the horizontal shaft back a few millimetres before once again adding the column.
At this point I installed the dovetail head slide and thoroughly lubricated all contact surfaces. The top gas strut screw was reinstalled. Pressure was relieved from the strut and the wire cut and removed.
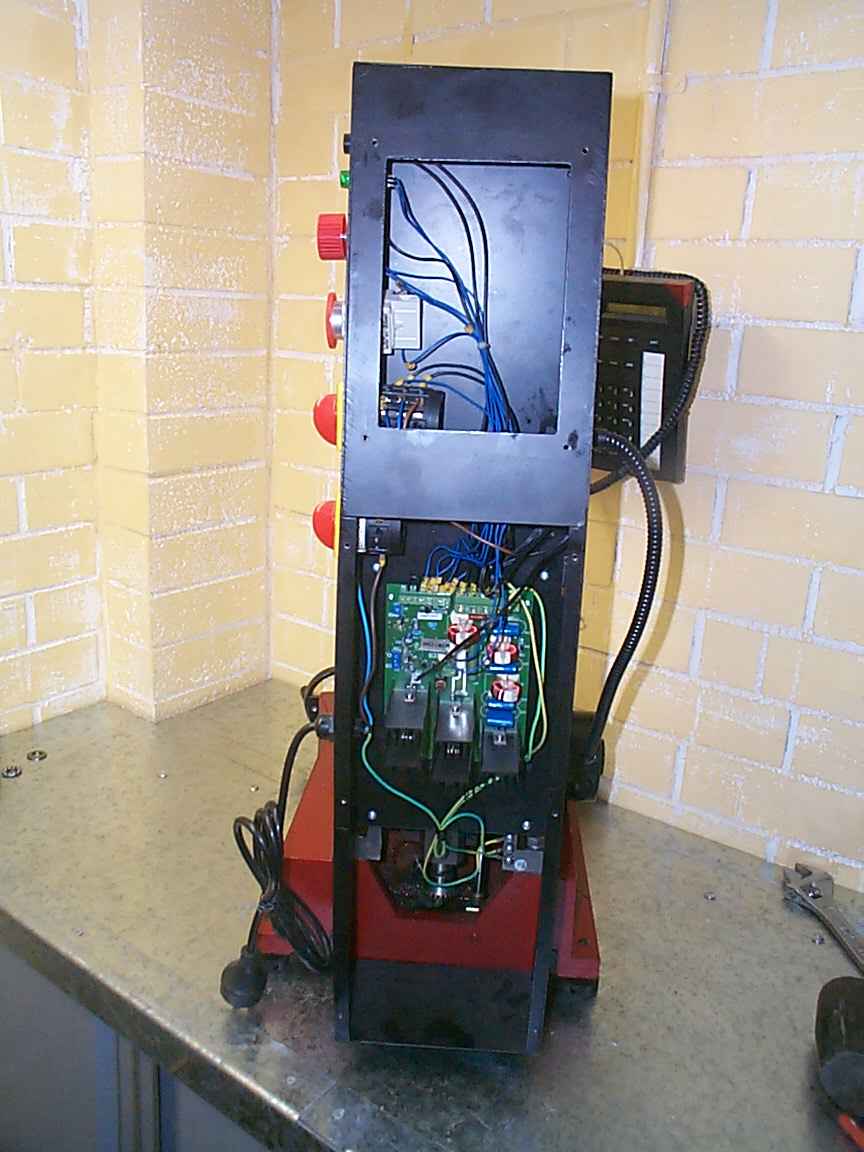
The rear column cover and electronics was added. This is a great setup. Very easy to remove if you need to work on the circuit board. This particular model did not ship with the fan installed so I will add my own at a later time.
A fan will be ideal when using the mill at extremely slow speeds under heavy load.
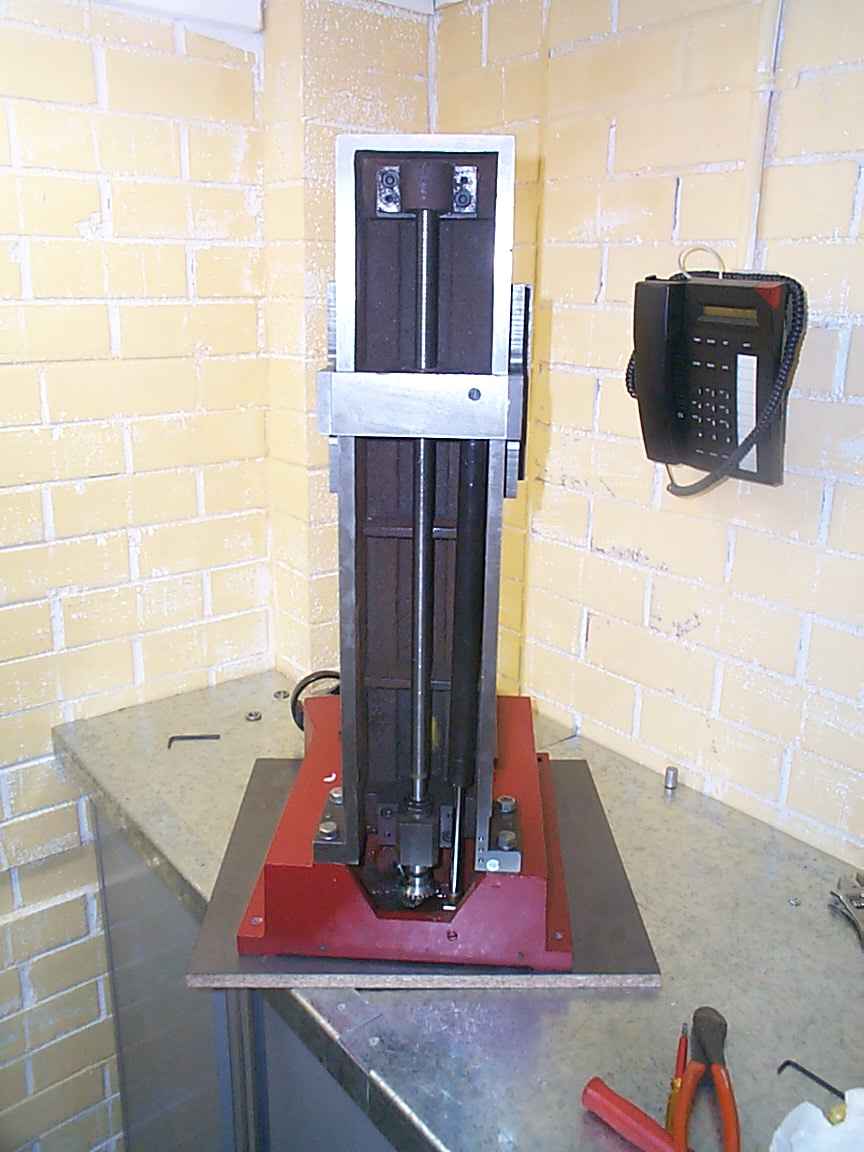
The head was added. Make sure you have a bolt ready. Once the head is positioned onto the round protrusion on the rear mounting plate, it is easy to keep it there with one hand and install one of the top screws. Don’t forget to add the other 3.
The motor was added next.
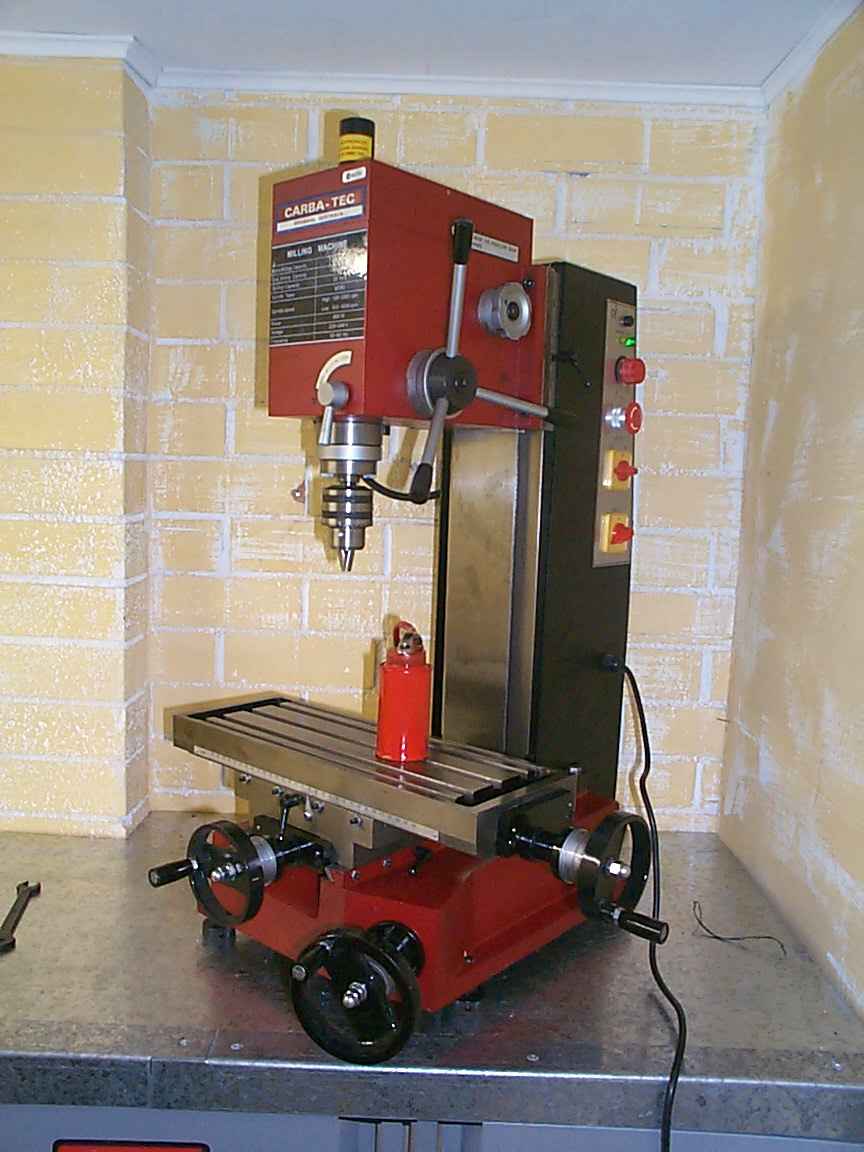
Voila.
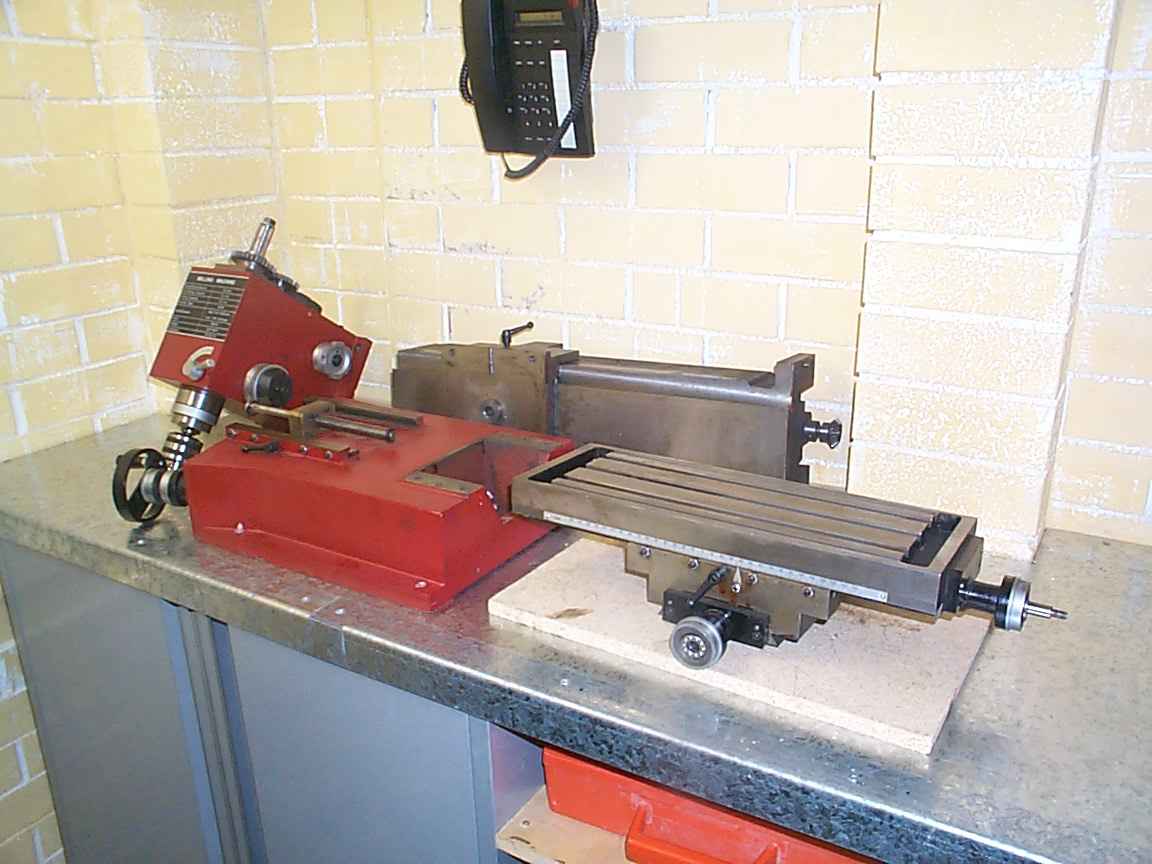
Clean and mean. After assembly I slid the Mill over to the right hand side of the bench. Keeping the machine at an angle makes it easier to reach the control knobs and increases the overall bench space by using the corner
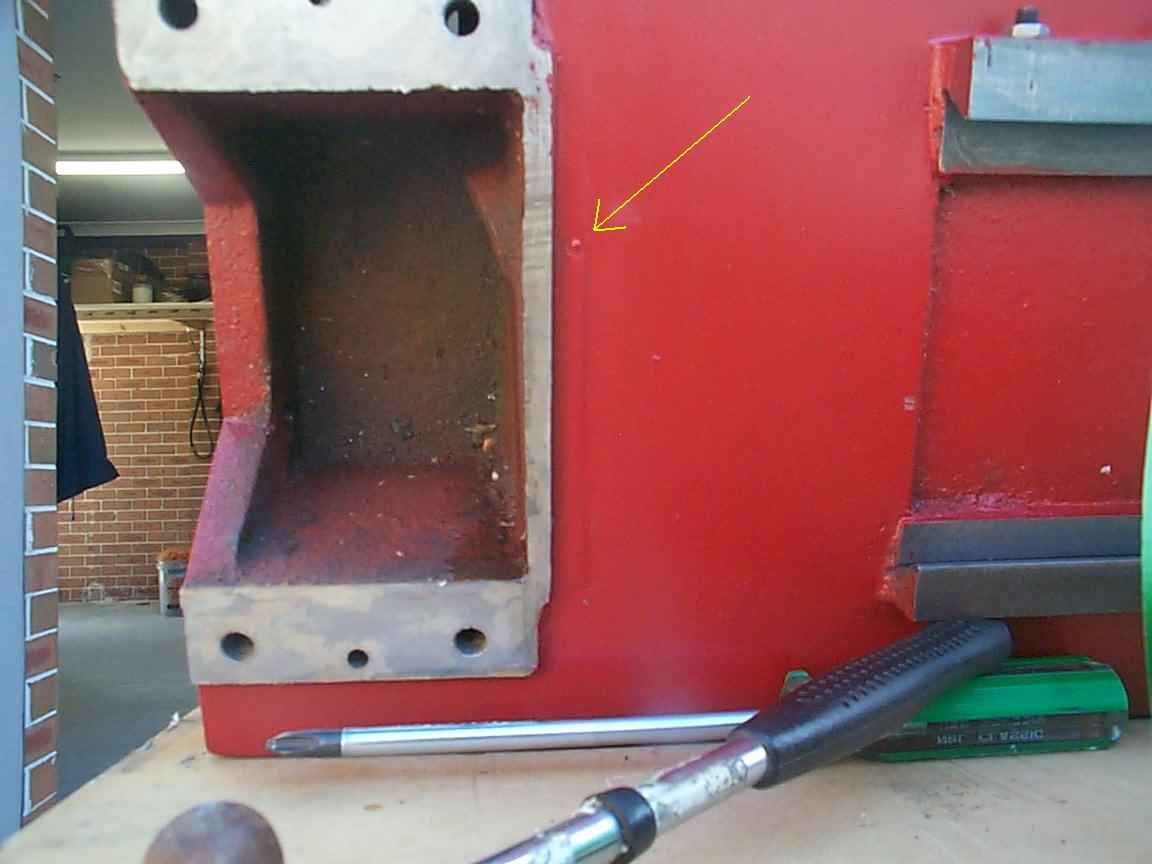
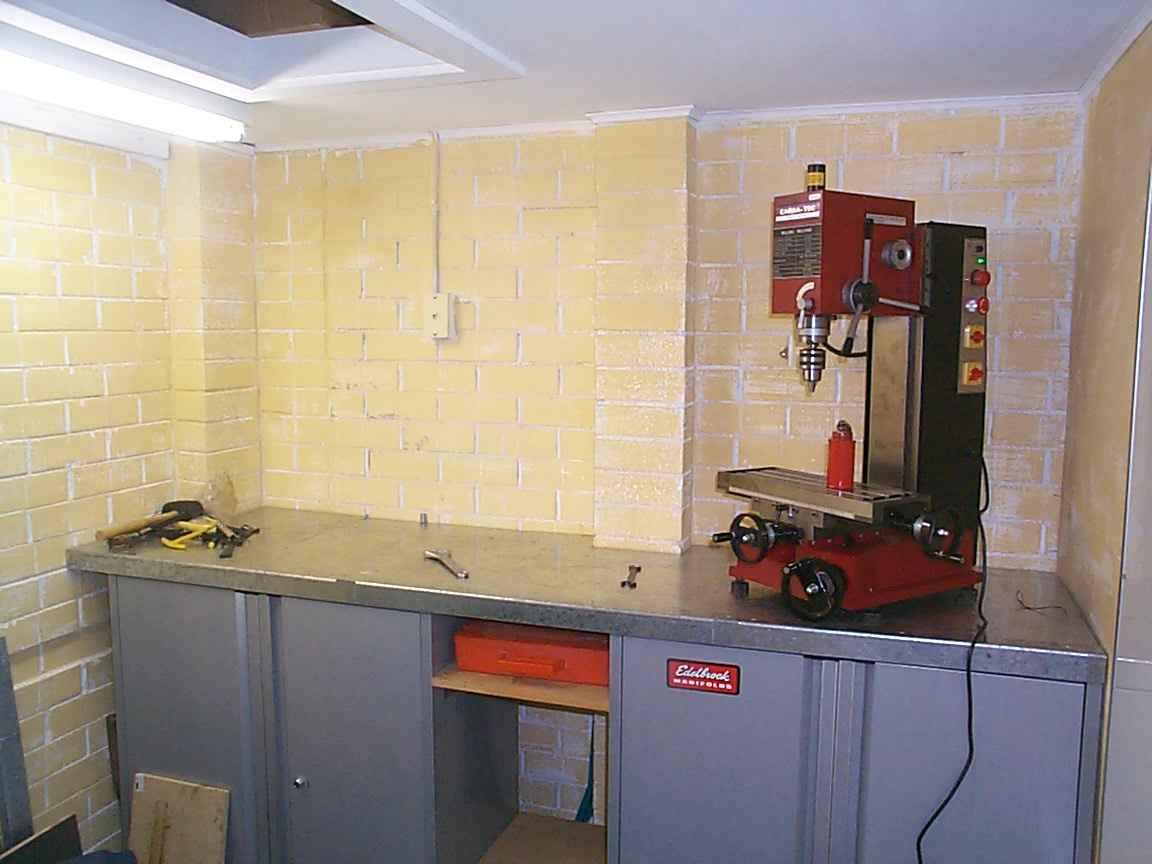
Here is a shot looking into the opening of my workshop. The length of the bench is 2.4 metres. The steel cabinets have 18mm MDF sheet on top covered by galvanised sheet metal. The front edges have been covered with 3mm x 40mm galvanised angle.
The cabinets are 1000mm high and 900mm wide. The bench is 625 mm deep.
Ball mill technology is more mature technology by Lilacy191
Ball mill technology is more mature technology-Lilacy191 While the world remains full of limestone, we also happen to be busting at the seams with an abundance of used plastic bottles. In comparison, based on 2010 data, the EPA estimates that the US alone generates 31 million tons of new plastics annually and only recovers 7.6 percent of the material. The same study calculated that 62.5 percent of paper and paperboard is recovered annually to be recycled at a profit.Could the world trash heap be the next raw construction material for the remainder of the 21st century? New Jersey Axion International (AXIH) believes so, and as a result Building Materials Processing Machine has brought a new development to market that questions conventional construction wisdom. Axion can turn plastic that lines streets and occupies landfills into a stronger and cheaper building material than even cement or steel. Currently Axion portfolio includes composite railroad ties, I-beams, pilings, and boards, but a nearly endless possibility of structural uses could exist tomorrow.
The report titled Construction and Mining Machinery/Equipment: A Global Strategic Business Report published by Global Industry Analysts, Inc., provides a comprehensive review of market trends, competitive scenario, mining equipment industry, product overview, product introductions/innovations, and recent industry activity. The study also analyzes market data and analytics in terms of sales volume for regions such as United States, Canada, Japan, China, Europe and so on. Analytics are presented in terms of units over the years 2000 through 2010. Long-term projections are provided for the period 2011-2015. Select product segments independently analyzed include Mini Excavators, Hydraulic Excavators, Pavers, Compactors, Cranes, Crawler Loaders, Crawler Tractors, Backhoe Loaders, Graders, Haulers/Dump Trucks, Rough Terrain Forklifts, Scrapers, and Wheeled Loaders.Quartz sand is a kind of silicate minerals, hard, wear-resistant, chemical stability, the main mineral component is SiO2,its color is white or colorless, translucent, hardness 7, brittle, shell Shaped fracture, oil sheen, density 2.65, its chemical, thermal and mechanical properties have obvious anisotropy, and do not dissolve in acid, slightly soluble in KOH solution, melting point 1750 ?. Quartz sand is an important industrial mineral raw materials, non-hazardous chemicals, widely used in glass, foundry, ceramics and refractories, smelting ferrosilicon, metallurgical flux, metallurgical, construction, chemical, plastics, rubber, abrasive and other industries. Jaw crusher:http://www.china-xingbang.com/ Ball mill:http://www.china-xingbang.com/
Zhengzhou xingbang company offers various crushers, such like jaw crusher, impact crusher, cone crusher, vsit crusher,stone crusher,hammer crusher,rock crusher and so on,we even products milling machine such as grinding mill.roller mill,hammer mill and raymond mill. When you need complete superior crushing solutions designed to handle reinforced concrete and asphalt to produce clean, saleable aggregates, count on shanghai xingbangh company as your single source supplier for equipment, applications expertise and product support.
Ball mill technology is more mature technology-Lilacy191 Grate Ball Mill:http://www.china-xingbang.com/5.html Magnesium Kiln:http://www.china-xingbang.com/14.html
About the Author
Xingbang Heavy Industrial Machinery Co., Ltd is a large-scaled joint-stock enterprise with an integration of R&D, production and marketing departments. We specialize in manufacturing large and medium-sized sand-making machinery.